

For a while now I’ve been aware that Black-eyed Susan flowers can be used for natural dyeing, and they’re specifically used to achieve a pale or sage green. But I admit, I’ve been skeptical. Green is a difficult color to dye on it’s own, and past attempts on my part have yielded browns, beiges, and yellows, but not green. So I went ahead with this test with trepidation and not much enthusiasm, but a sense of perseverance to not leave any possibility untested.
To my surprise and delight, I managed to get a beautiful celery green tone, despite almost messing up this experiment. Click the video above to hear the details and find the complete process below. I highly recommend dyeing with Black-eyed Susan flowers if you have access to an abundant source of them. If you can’t use them immediately, pick them and freeze for future use.
Step 1: Prepare the yarn.
Mordant the wool with alum. I use a 10% by weight-of-goods proportion of alum to wool. Botanical Colors has a great tutorial on mordanting with alum.
Step 2: Prepare the flowers.
Here in Vermont, Black-eyed Susans bloom in July and August. I use pruning shears or kitchen scissors to cut off the flower heads, as the stems are quite tough and strong. Harvest approximately equal amounts of flowers to weight of dyestuff, or enough to fill your dye kettle 1/2 or 2/3 full.
Step 3: Extract the dye and wet the yarn.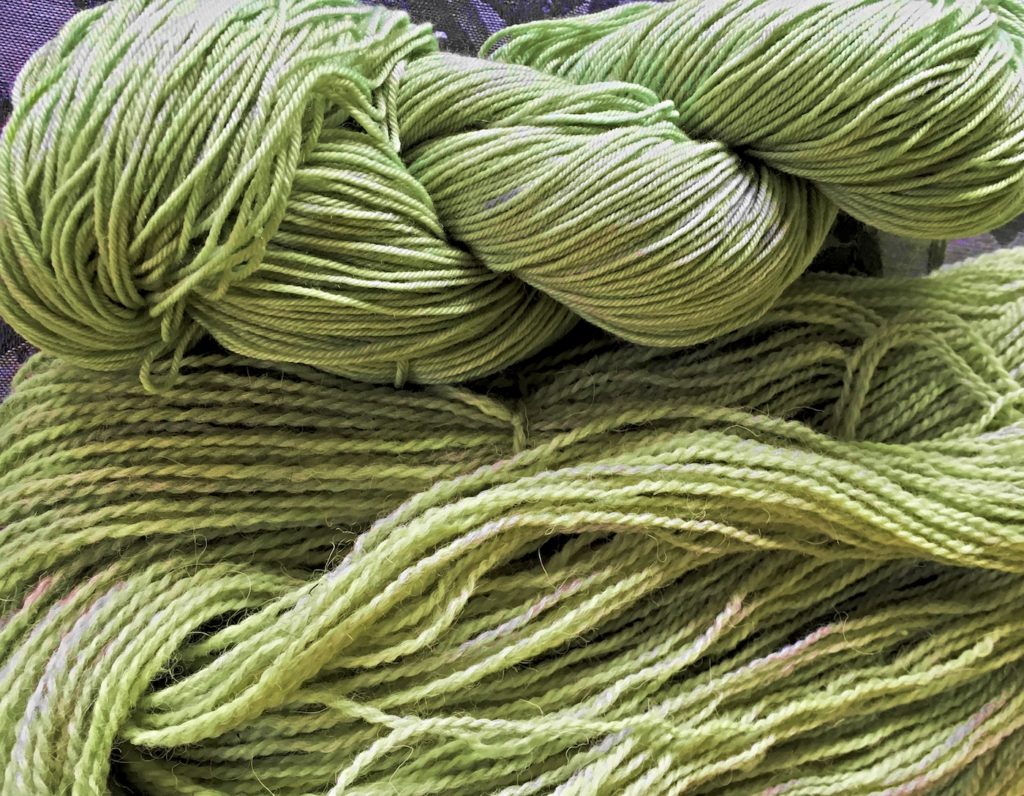
Place the flowers and some warm water in a dye pot on your heat source, then slowly bring to temperature at approximately 180 F). Stir occasionally and cook for 30 – 45 minutes, or until the dye bath is darkening. The longer you let the flowers cook, the more dye color you will extract.
While the color is extracting, wet your yarn out in hot water in a covered container (like a bucket or extra pot with a lid) to retain the heat. When the color of the dye is looking saturated, strain off the liquid into another pot or bucket. I use a mesh paint strainer for this purpose to catch the plant material.
Step 4: Dye the fiber.
Pour the dye liquid into your dye kettle and place back on the heat source.
Gently lift your yarn or fiber out of the soaking container and place into the dye kettle. Give it a gentle stir and poke to submerge.
Simmer the yarn in the dye bath for at least an hour, giving it a gentle swish every once in a while (too much agitation can felt the yarn, so stirring should be gentle and infrequent).
After an hour, turn off the heat and cover the pot. I like to leave my dye kettles overnight to cool slowly.
Step 5: Rinse and dry.
Gently lift the fiber out of the dye kettle and allow the excess dye liquor to drain back into the pot. Then transfer the yarn to a bucket of clean water and let soak for a couple of minutes. If necessary, lift the fiber out of the rinse bucket and place into a third bucket or pot of clean water, to rinse a second time. I’ve found Black-eyed Susan dye doesn’t bleed much and doesn’t need much rinsing.
In a shady spot, hang the wet yarn up to dry or drape over the back of a lawn chair and allow to dry. You might want to bring the yarn inside after it stops dripping, as humidity in the air can keep it from drying completely outside.
Have you tried dying with Black-eyed Susans? We’d love to know. Leave a comment here or on the accompanying video and let us know how it turned out.