

This year has afforded several opportunities to try new-to-me natural dyes, and this week I’m discussing my first trial dyeing with black hollyhocks. The flowers resemble a very dark purple, verging on black in the center of the flowers. Use the petals only for dyeing. If you want to add hollyhocks to your garden you can buy seeds from a number of companies, including the Seed Savers Exchange. If you can’t grow or find hollyhocks in your area, you can buy them online: Grand Prismatic Seed sells petals.
The appeal for me is the gift of a natural blue that is easier to extract and dye with than using indigo, and my first attempt with black hollyhocks yielded evenly saturated, if light, tones. If you’ve had success dyeing darker tones of blue please let me know in the comments! I look forward to adding black (and possibly pink and purple) hollyhocks to my dye garden and experimenting further with these beautiful flowers.
Step 1: Prepare the yarn.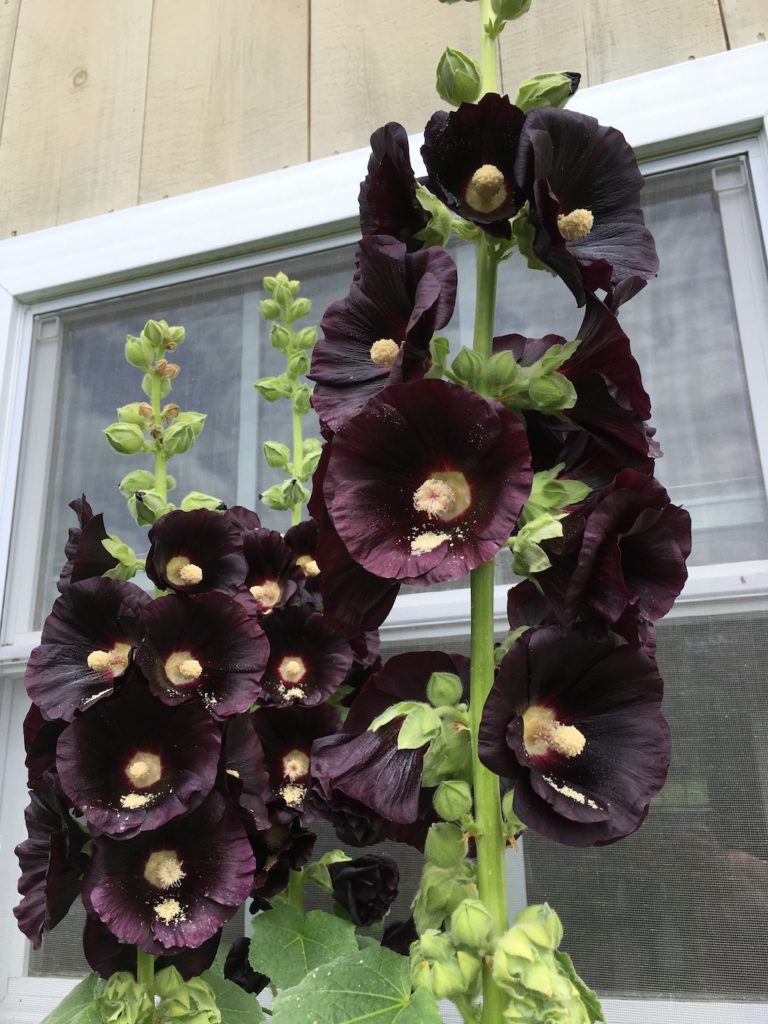
Mordant the wool with alum. I use a 10% by weight-of-goods proportion of alum to wool. Botanical Colors has a great tutorial on mordanting with alum.
Step 2: Prepare the flowers.
Here in Vermont, black hollyhocks bloom in July. For the shade of blue achieved here, I used approximately 2 cups of flower petals and 300 grams total of yarn.
Step 3: Extract the dye and wet the yarn.
Place the petals and some warm water in a dye pot on your heat source, then slowly bring to temperature at approximately 180 F). Stir occasionally and cook for 30 – 45 minutes, or until the dye bath is darkening. The longer you let the flowers cook, the more dye color you will extract.
While the color is extracting, wet your yarn out in hot water in a covered container (like a bucket or extra pot with a lid) to retain the heat. When the color of the dye is looking saturated, strain off the liquid into another pot or bucket. I use a mesh paint strainer for this purpose to catch the plant material.
Step 4: Dye the fiber.
Pour the dye liquid into your dye kettle and place back on the heat source.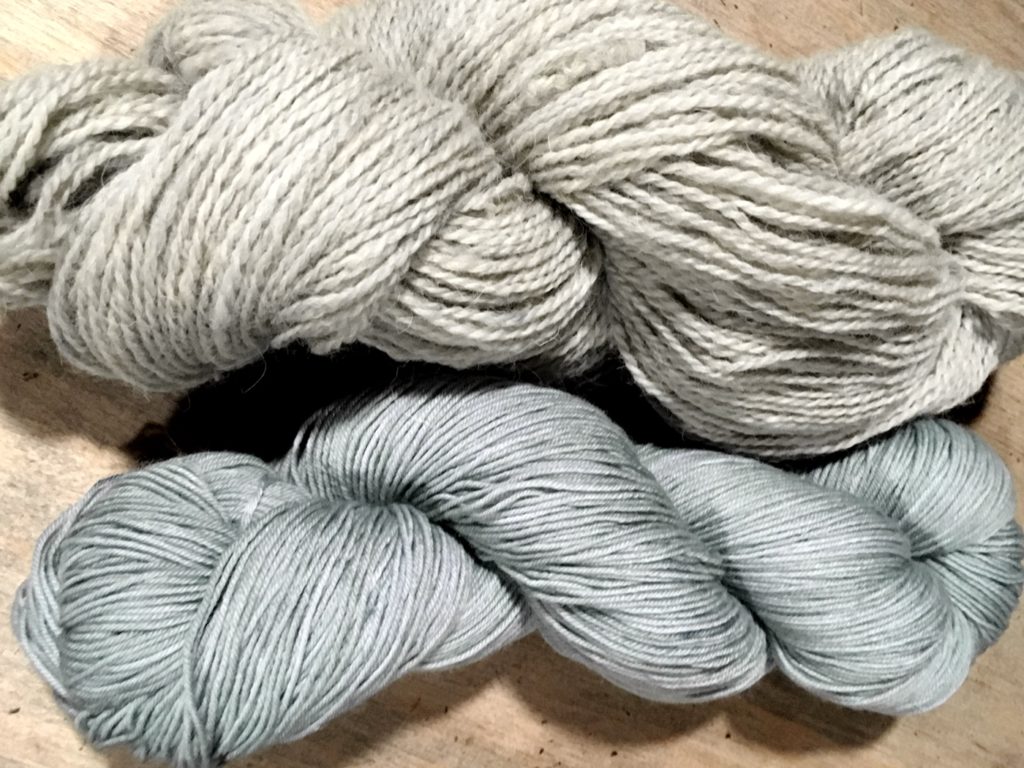
Gently lift your yarn or fiber out of the soaking container and place into the dye kettle. Give it a gentle stir and poke to submerge.
Simmer the yarn in the dye bath for at least an hour, giving it a gentle swish every once in a while (too much agitation can felt the yarn, so stirring should be gentle and infrequent).
After an hour, turn off the heat and cover the pot. I like to leave my dye kettles overnight to cool slowly.
Step 5: Rinse and dry.
Gently lift the fiber out of the dye kettle and allow the excess dye liquor to drain back into the pot. Then transfer the yarn to a bucket of clean water and let soak for a couple of minutes. If necessary, lift the fiber out of the rinse bucket and place into a third bucket or pot of clean water, to rinse a second time. I found that the black hollyhock dye doesn’t bleed much and doesn’t need much rinsing.
In a shady spot, hang the wet yarn up to dry or drape over the back of a lawn chair and allow to dry. You might want to bring the yarn inside after it stops dripping, as humidity in the air can keep it from drying completely outside.
Have you tried dying with hollyhocks? We’d love to know. Leave a comment here or on the accompanying video and let us know how it turned out.